How to Install Plugins on Oxide & Carbon Rust Servers
landis temple · Aug 9, 2026
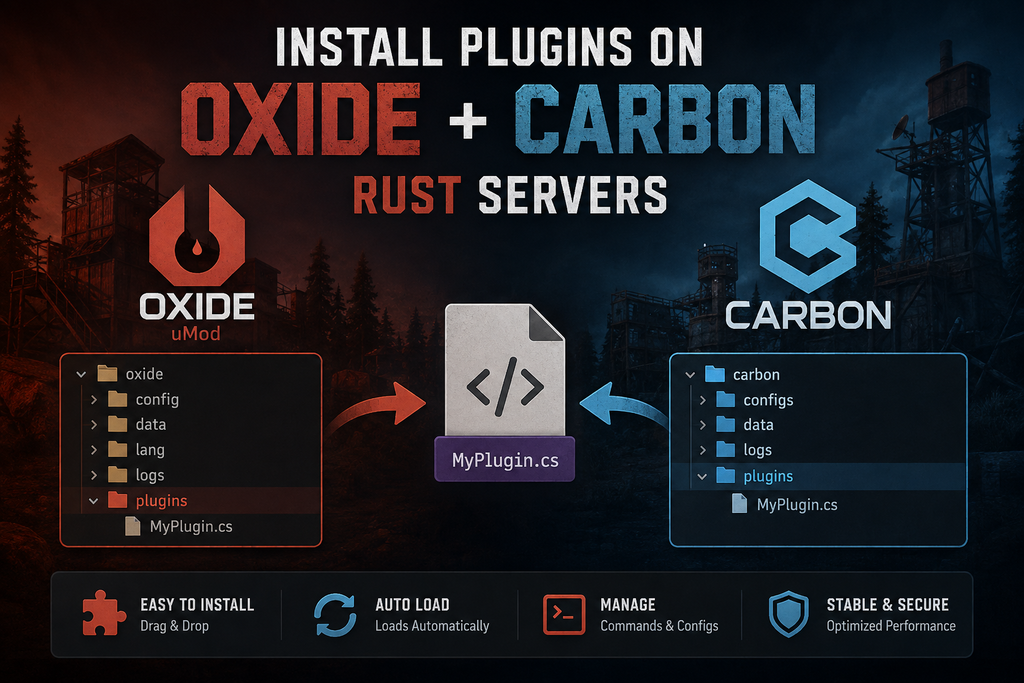
How to Install Plugins on Oxide & Carbon Rust Servers
Plugins are one of the easiest ways to add new features to a modded Rust server. Whether you're using Oxide/uMod or Carbon, installing a plugin usually takes only a few minutes.
This guide covers installing, loading, updating, reloading, and removing .cs Rust plugins.
Before You Start
Make sure your Rust server already has Oxide/uMod or Carbon installed and working.
Most Rust plugins are distributed as C# files with the .cs extension.
For example:
Kits.cs
BetterChat.cs
MyPlugin.cs
You will also need access to your server files through your hosting provider's file manager, FTP/SFTP, or direct access to the server.
Installing a Plugin on Oxide / uMod
Oxide stores Rust plugins inside the following directory:
oxide/plugins/
Step 1 — Download the Plugin
Download the .cs file for the plugin you want to install.
For example:
MyPlugin.cs
Do not rename the plugin unless the plugin developer specifically tells you to do so. The filename may be expected to match the plugin's class name.
Step 2 — Open the Plugins Folder
Navigate to your Rust server directory and open:
oxide/plugins/
Your server structure should look something like this:
RustServer/
├── oxide/
│   ├── config/
│   ├── data/
│   ├── lang/
│   ├── logs/
│   └── plugins/
│       └── MyPlugin.cs
├── server/
└── RustDedicated.exe
Upload the .cs file into the plugins folder.
Step 3 — Let Oxide Load the Plugin
If your server is already running, Oxide will normally detect the new .cs file and attempt to compile and load it automatically.
Watch your server console.
A successful plugin load will usually produce a message indicating that the plugin has been compiled and loaded.
If there is a problem, you may see compilation errors in the console.
Step 4 — Verify the Plugin
You can check your currently loaded Oxide plugins using:
oxide.plugins
Look for your newly installed plugin in the list.
Installing a Plugin on Carbon
Carbon is an alternative modding framework for Rust and supports many plugins originally developed for Oxide/uMod.
Carbon plugins are normally placed inside:
carbon/plugins/
Step 1 — Download the Plugin
Download the plugin's .cs file.
For example:
MyPlugin.cs
Step 2 — Upload It to Carbon
Navigate to:
carbon/plugins/
Upload your plugin file there.
Your server may look similar to:
RustServer/
├── carbon/
│   ├── configs/
│   ├── data/
│   ├── logs/
│   └── plugins/
│       └── MyPlugin.cs
├── server/
└── RustDedicated.exe
Carbon should detect the new plugin and attempt to compile and load it while the server is running.
Check the server console for any errors.
Manually Loading or Reloading Plugins
You don't normally need to restart your entire Rust server every time you change a plugin.
For Oxide/uMod, you can reload a plugin with:
oxide.reload PluginName
For example:
oxide.reload BetterChat
You can also unload it:
oxide.unload BetterChat
And load it again:
oxide.load BetterChat
Depending on your Carbon version and configuration, Carbon also provides plugin management commands. If a plugin doesn't automatically reload after being changed, use Carbon's plugin commands or check the current Carbon command list from the server console.
Plugin Configuration Files
Many plugins automatically generate a configuration file the first time they successfully load.
For Oxide, configuration files are usually located in:
oxide/config/
For example:
oxide/config/BetterChat.json
Carbon uses its own directories for framework files, although compatibility behavior can vary depending on the plugin and Carbon version.
Configuration files are commonly JSON files.
You can open them using a text editor such as Notepad++, Visual Studio Code, or your hosting provider's file editor.
After changing a configuration, reload the plugin so the new settings take effect.
For example:
oxide.reload BetterChat
Plugin Data Files
Don't confuse config files with data files.
A config file normally contains settings chosen by the server owner.
A data file may contain information created while the server is running, such as:
-
Player information
-
Purchased items
-
Statistics
-
Rewards
-
Cooldowns
-
Saved locations
-
Plugin databases
On Oxide, these files are commonly stored inside:
oxide/data/
Be careful when deleting files from this directory. Removing a data file may permanently reset that plugin's saved information.
Updating a Plugin
Updating a plugin is normally simple.
Download the latest .cs version and replace the old plugin file.
For Oxide:
oxide/plugins/PluginName.cs
For Carbon:
carbon/plugins/PluginName.cs
The framework will usually detect the change and reload or recompile the plugin.
It's still a good idea to create a backup of the old plugin and its configuration/data before installing a major update.
Removing a Plugin
To remove an Oxide plugin, you can first unload it:
oxide.unload PluginName
Then remove its .cs file from:
oxide/plugins/
For Carbon, remove the plugin from the corresponding Carbon plugins directory after unloading it if necessary.
Keep in mind that removing the .cs file does not necessarily delete the plugin's configuration or saved data.
This is useful if you plan to reinstall the plugin later.
If you want to completely reset a plugin, you may also need to remove its related configuration and data files.
Always make a backup before deleting data.
Common Plugin Installation Problems
Plugin Doesn't Load
First, check your server console.
The console usually tells you exactly why the plugin failed.
Common causes include:
-
Plugin compilation errors
-
Outdated plugin
-
Missing dependency
-
Incorrect plugin version
-
Incorrect filename
-
Plugin incompatible with the current Rust update
-
Plugin incompatible with your framework
-
Missing required extension or library
Compilation Errors
If you see messages containing something similar to:
Error while compiling
the plugin's C# code failed to compile.
This doesn't automatically mean your server is configured incorrectly.
The plugin may simply be outdated after a Rust, Oxide, or Carbon update.
Read the complete error message because it normally contains the filename, line number, and reason for the failure.
Missing Dependency
Some plugins require another plugin or extension.
For example, a plugin might depend on:
ImageLibrary
Economics
ServerRewards
PlaceholderAPI
If the required dependency isn't installed, some or all functionality may fail.
Always read the plugin's installation requirements before installing it.
Plugin Loads but Commands Don't Work
If the plugin successfully loads but players cannot use its commands, check:
-
Permissions
-
Configuration
-
Command names
-
Required dependencies
-
Player groups
-
Admin requirements
Many Rust plugins use permissions to control access.
An Oxide permission may look like:
myplugin.use
You can grant a permission to a player with:
oxide.grant user STEAMID myplugin.use
Or grant it to a group:
oxide.grant group default myplugin.use
Always use the exact permission documented by the plugin developer.
Oxide vs Carbon Plugin Compatibility
Carbon is designed with strong compatibility for the Rust plugin ecosystem, but you shouldn't assume that every Oxide plugin will behave identically on Carbon.
Plugins that use unusual hooks, extensions, external libraries, or framework-specific functionality may require changes.
If you're downloading a paid or actively maintained plugin, check whether the developer officially supports:
Oxide/uMod, Carbon, or both.
Recommended Installation Process
For the safest installation workflow:
-
Download the plugin from a trusted source.
-
Read its requirements and dependencies.
-
Back up important server files.
-
Upload the
.csfile to the correct plugins directory. -
Watch the server console while it compiles.
-
Check for errors or missing dependencies.
-
Configure the generated settings.
-
Reload the plugin if necessary.
-
Configure permissions.
-
Test the plugin before making it available to all players.
You normally do not need to restart the entire Rust server just to install a plugin. Both Oxide and Carbon are designed to allow plugins to be loaded and updated while the server is running.
Final Directory Reference
Oxide / uMod
oxide/plugins/     → Plugin .cs files
oxide/config/      → Plugin configuration
oxide/data/        → Plugin saved data
oxide/lang/        → Localization files
oxide/logs/        → Logs
Carbon
carbon/plugins/ → Plugin .cs files
Other Carbon directories and compatibility paths can depend on the Carbon version and how the plugin stores its files.
That's It!
Once the .cs file is in the correct plugins directory and successfully compiles, your Rust plugin is installed.
If something doesn't work, check the server console first. Compilation errors, missing dependencies, and configuration problems are usually reported there and can save you a lot of troubleshooting time.